

Metro Exodus Shambler Magazine Location
All the Metro Exodus map locations: every upgrade and side mission you need to find
Being able to find all the Metro Exodus map locations can take time in the game's open up world levels. You lot'll have to explore and search the landscape with binoculars to locate all at that place is to do in the distant corners of the Volga, Caspian, and Taiga areas. While key missions and activities are fairly hard to miss, in that location's a range of locations and non-essential objectives, gear and characters you could walk completely by, simply considering y'all didn't look in quite the correct direction. Patently no i wants to do, that and so this guide to all the Metro Exodus map locations will assist y'all know where to look, and let you know what yous're looking for.
The Volga, Caspian, and Taiga maps in Metro Exodus all serve as separate hub areas in Metro Exodus (opens in new tab) with plenty of objectives and gear to find. Then coming upwardly we've flagged and highlighted all the things y'all don't desire to miss if you desire full experience of the story and gameplay. Naturally, in that location may be a few very balmy spoilers ahead for things yous could otherwise observe on your own - mainly in terms of locations and what yous can find in that location, but that is kind of the point of this guide. Withal, we've avoided anything that might ruin the story.
Check out our top Metro Exodus tips in the video below:
Use your binoculars to get the best out of the map
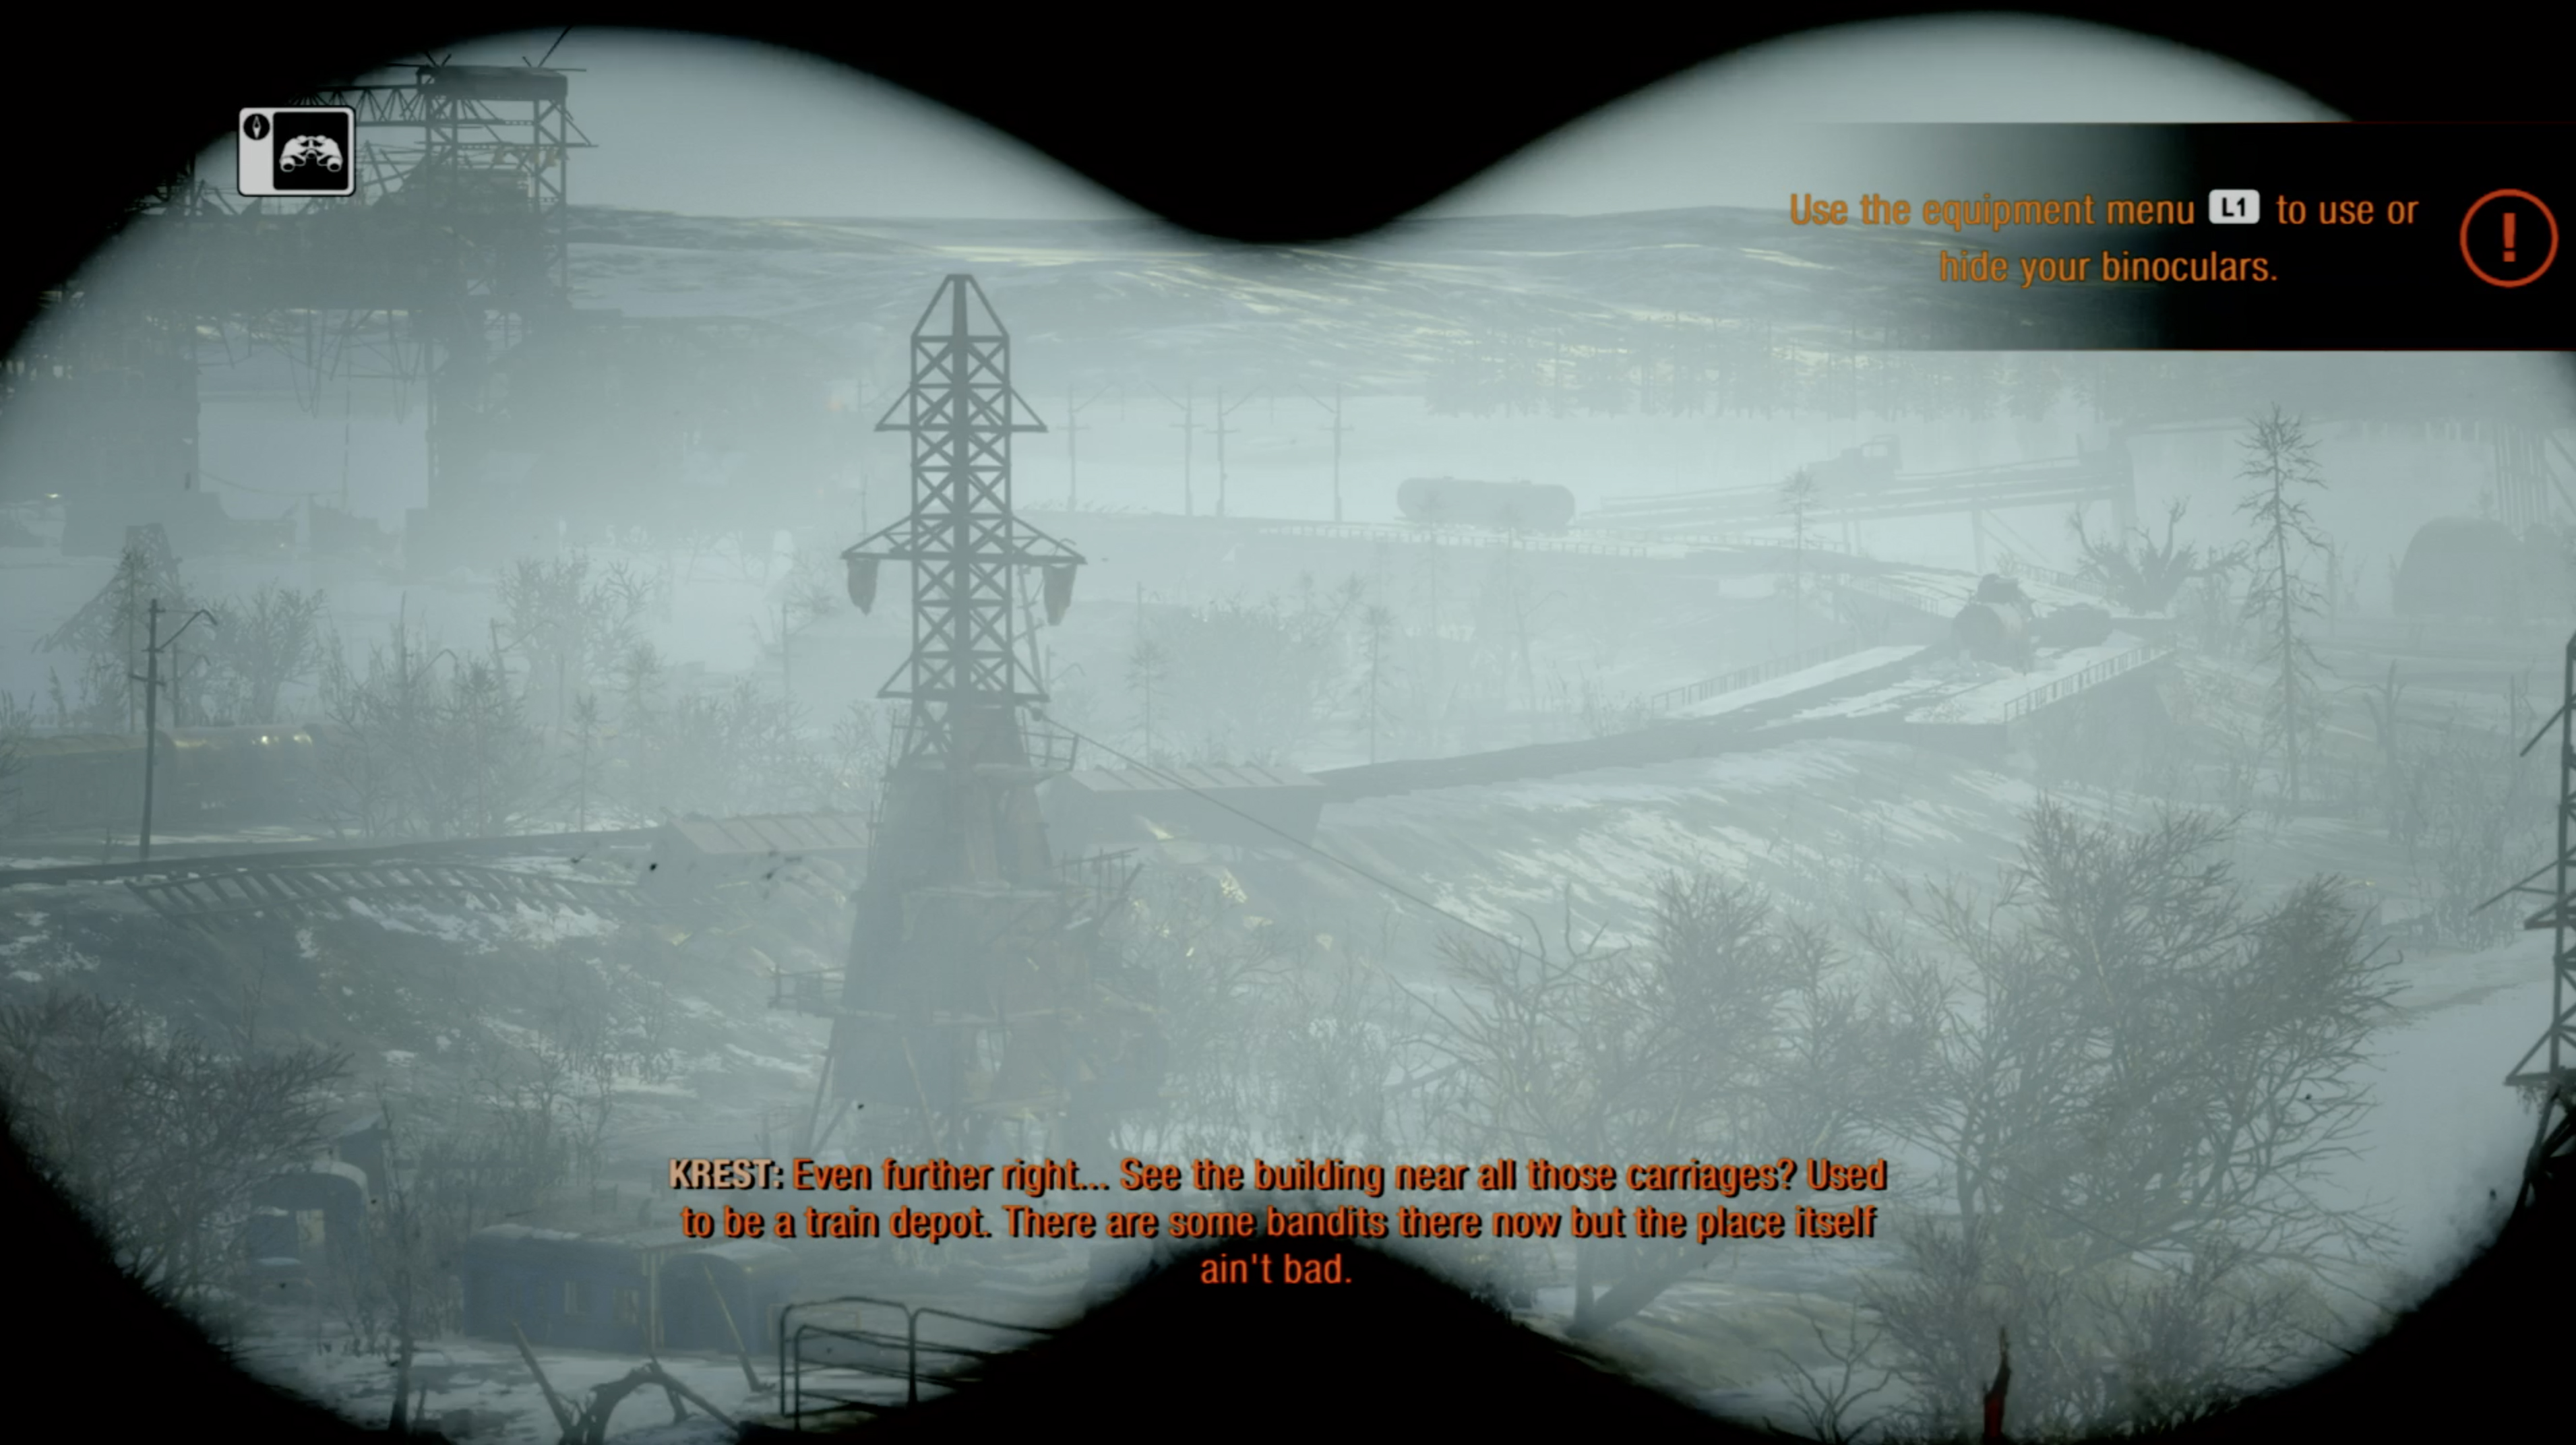
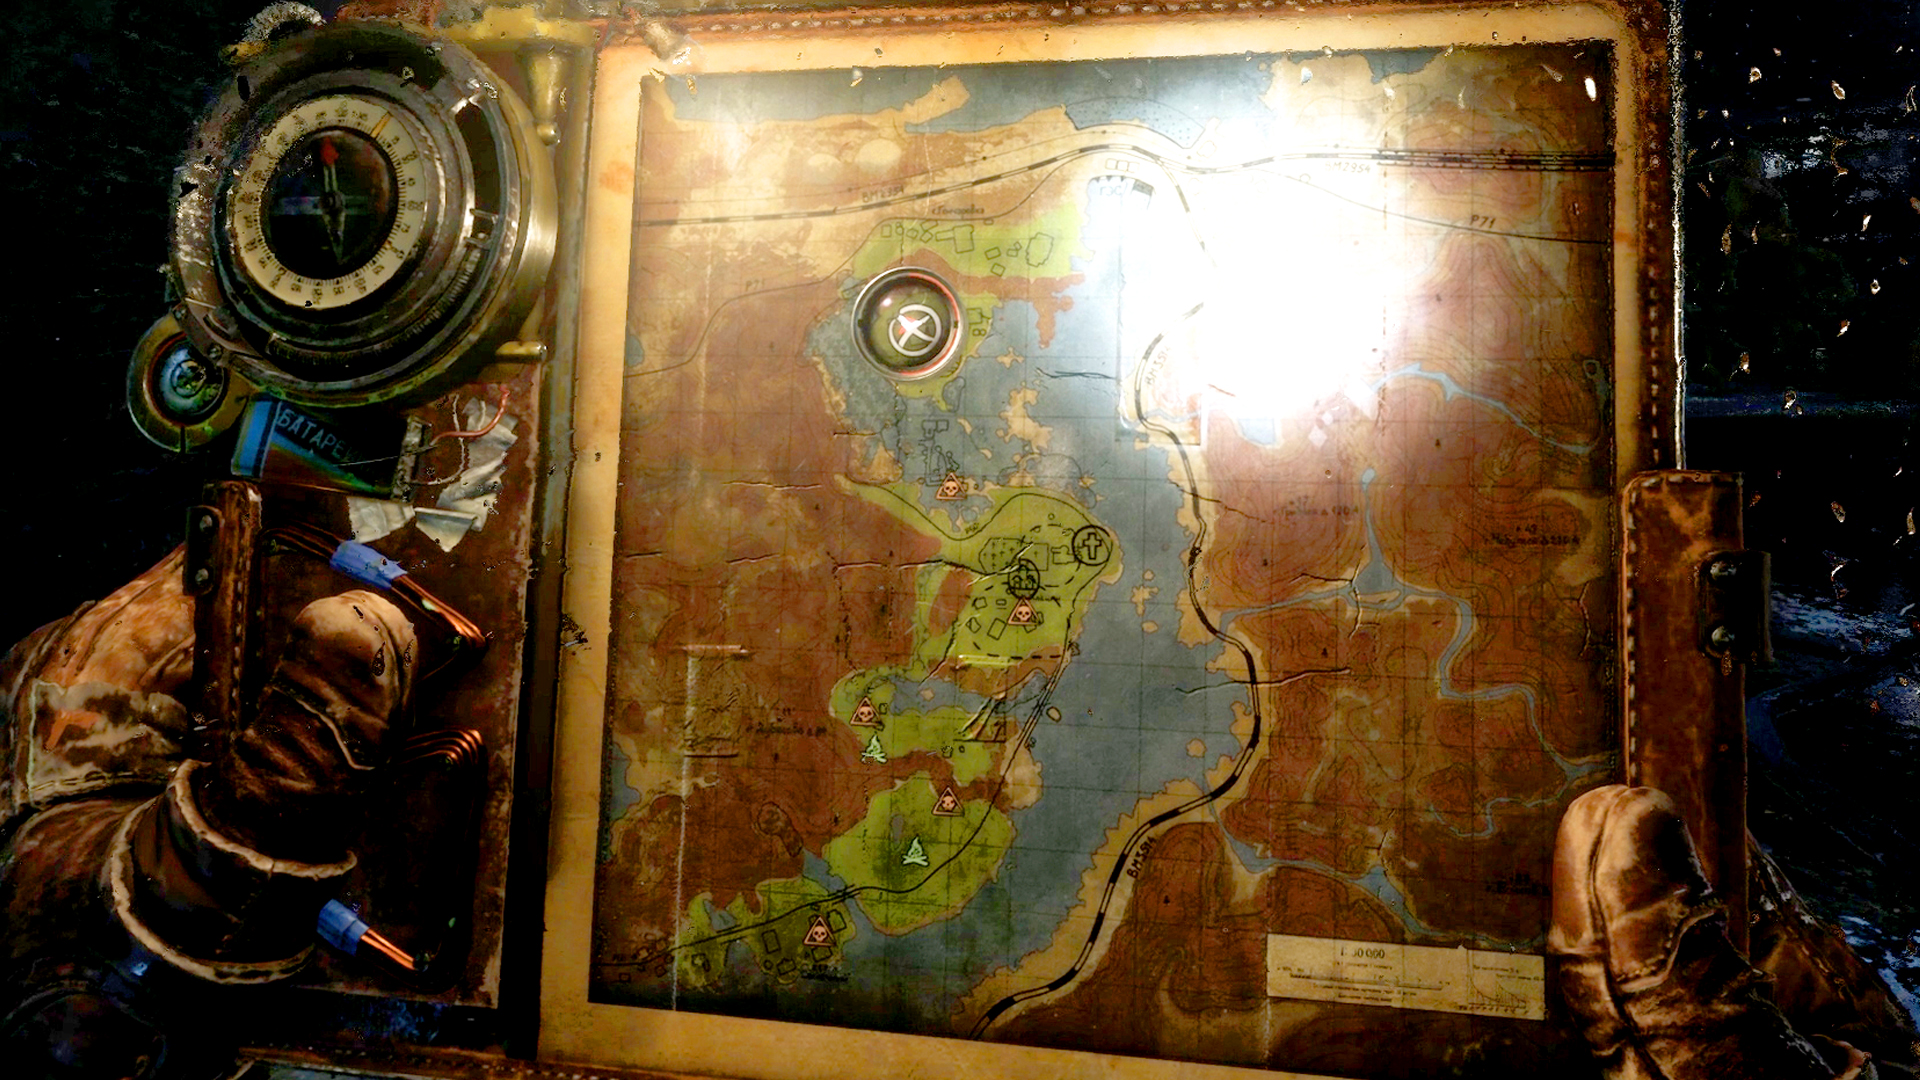
Quick tip before you become anywhere: apply your binoculars to wait around regularly. Yous go them before long after meeting the engineer Krest on the crane to expect at various landmarks he calls out. Anywhere worth visiting volition make a clicking noise as you look over it. If you concur that position and zoom in you should hear a whir and see a map icon appear indicating an area has been marked to your map. If you don't get the noise and icon, endeavor zooming in and out and gently moving effectually the surface area of the click. Information technology's worth doing this regularly as new viewpoints will permit you see different locations, and even right upwards to the end of a chapter you can all the same observe new places.
What practise the icons mean?
There are just four icons to really worry about on the Metro Exodus map: the big white cantankerous is your side by side master objective, a green building is a safehouse (with a workbench to fix and arts and crafts gear, and a bed to change the time of 24-hour interval), while a red risk skull and bones indicates enemies and, more than chiefly, gear to save. These will all be question marks until you lot visit them, at which point a compass marker volition appear on screen to show the map has updated.
The Volga
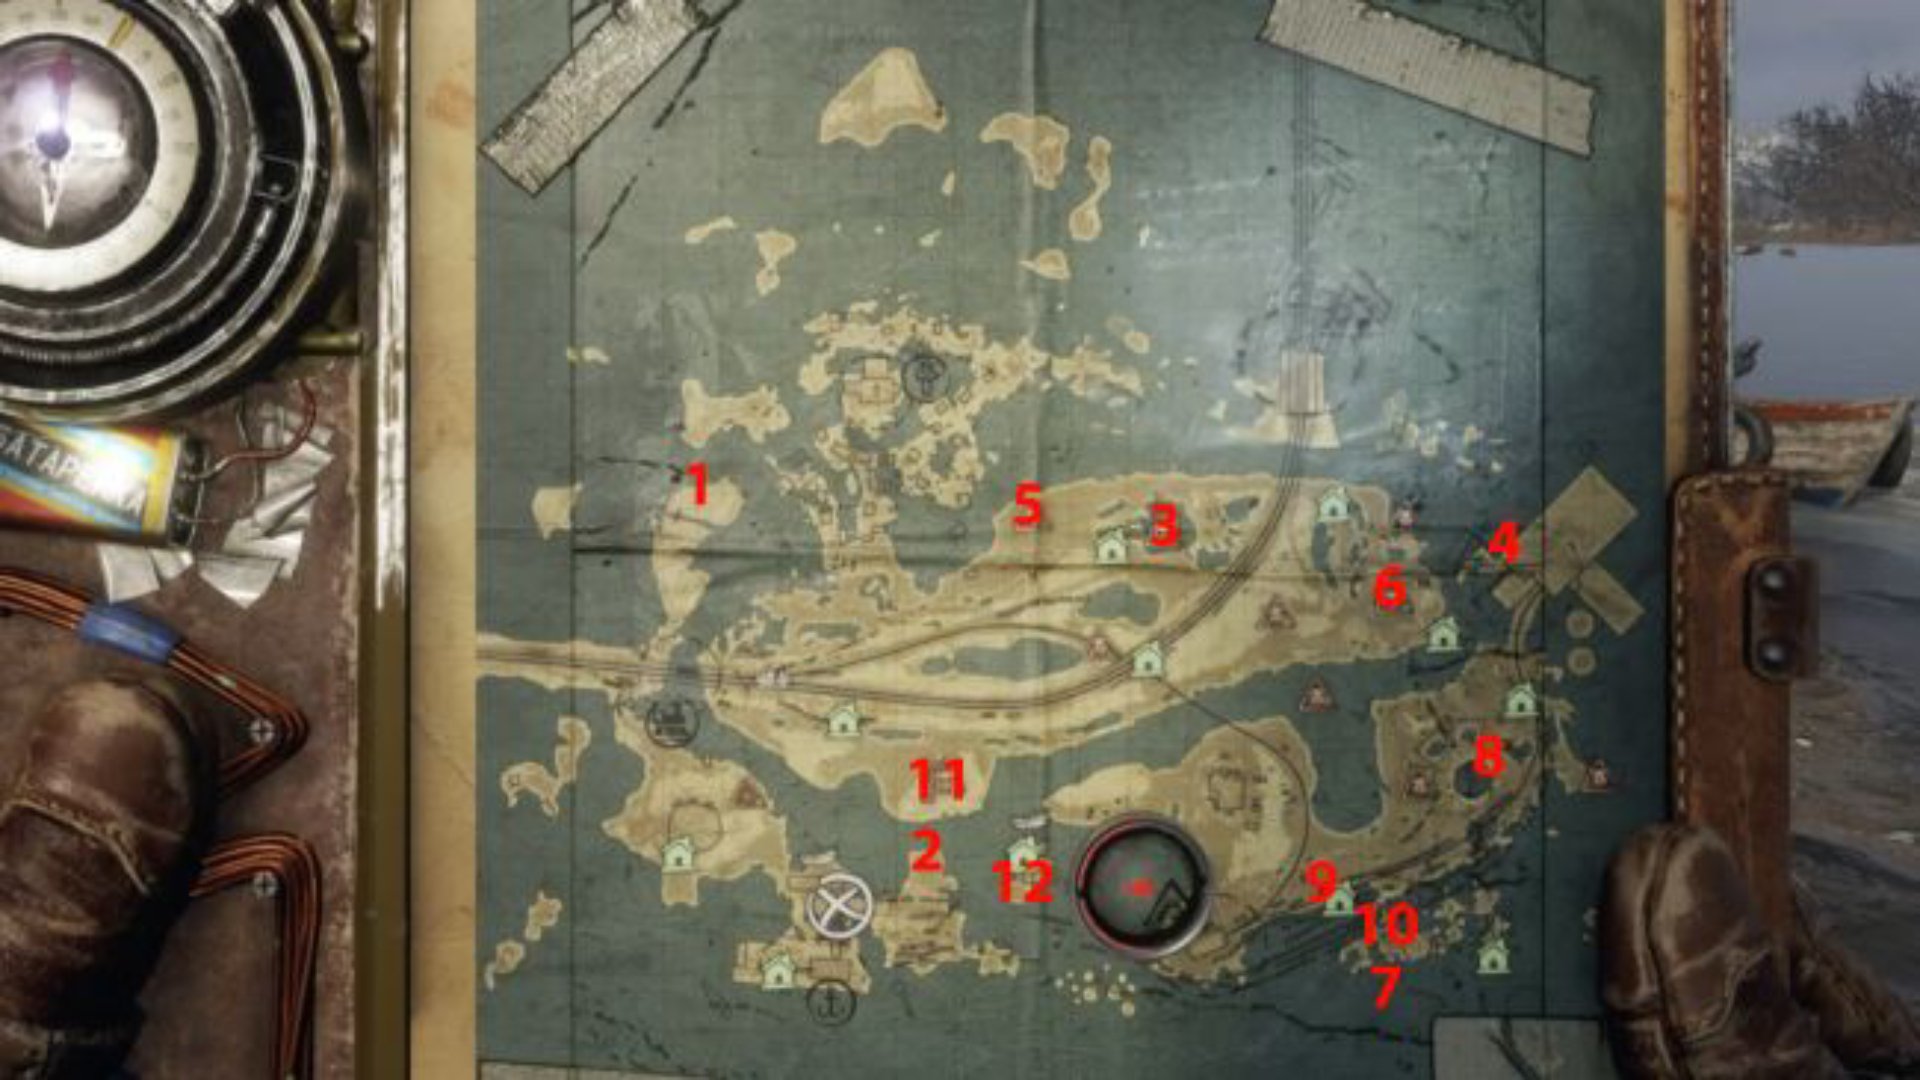
The Volga's characterised past its swampy watery areas and the need to utilize a gunkhole to get around. The of import affair is it's possible to find a number of hugely useful upgrades and gadgets right at the start if you know where to look. Equally a rule the last boat you used will appear on the map but you can discover others. Considering of the unsafe mutant shrimp and a behemothic catfish, the water tin can be dangerous so it'due south worth sticking close to the shore in the boat so you tin can disembark quickly if you demand to.
Hither's what you need to go along an heart out for:
- Sniper scope and compass - Yous'll find a crashed plane hither with a sniper scope and, more importantly, a compass that will ever point towards your next objective.
- Kalash rifle upgrades - There'south a tiny outpost here where you'll find some good Kalash rifle upgrades early on to increase impairment and stability.
- Ammo conveying upgrade and Tsar Fish room Primal - There are some prisoners here y'all can rescue who will give you a primal to access the room below (point iv) where you can find the night vision goggles. There's also Ammo Pouches upstairs that let you lot behave more bullets.
- Night vision goggles - The night vision goggles here you can admission early via the key from the prisoners you detect at 3 above, or y'all can become them as function of the mission to become the railcar after you lot kill the Tsar Fish.
- Gas mask upgrades - There's a pocket-size shack hither total of fungus and spiders where you can find the Extended Filter, an upgrade that makes your gas mask filters concluding longer.
- Throwable ammo upgrade - This gas station has a few bandits to take out. Kill them and explore inside to find the throwing weapon harness which lets yous conduct more than knives, grenades and molotov cocktails.
- Metal detector - There'southward a metal detector here that will assist you locate resources if you equip it to your bracer. Look for a broken down crane and information technology'll be in a small rusted firm in front of that. You'll accept to break the lock off to get inside.
- Kalash rifle upgrades - There are some ruined buildings here that are basically pillars and beams. Await for some ramps and shipping crates that accept you up to i of the beams and follow information technology around to notice a ladder and an outpost. Yous'll notice a Kalash heavy stock, and long barrel and compensator for a big damage and accuracy heave.
- Kalash burglarize suppressor - The safehouse hither has a Kalash suppressor barrel if y'all want some total machine silenced fun (it'll cutting damage and range merely alert less people). There'due south also another sniper scope if you haven't already got one.
- Teddy deport - If you want to find the teddy deport for one of the side missions it's on top of a big cylindrical gas tower hither. Be careful because there'due south a lot of radiation.
- Guitar - If you desire to recover the guitar for ane of the side missions you'll notice information technology here atop a belfry filled with bandits. There'southward likewise a prisoner you can release.
- Battery upgrade - There's a Charge Controller here that will extend your battery life. You'll notice a large building with electrically sealed doors and a smaller shed with a generator. There's a gas can around the back of the shed you tin can use to power upwardly the doors and open them to retrieve the battery upgrade from… somewhere interesting.
Yamantau
The Yamantau section of the game is basically a linear story beat out with no open world elements. However, y'all can grab a dark vision scope hither. Merely keep an eye out for a Kalash on a table near a yellow junction box that lets you plough all the lights off. You'll also get the Gatling Gun but that's incommunicable to miss equally it's function of a small boss run into.
The Caspian
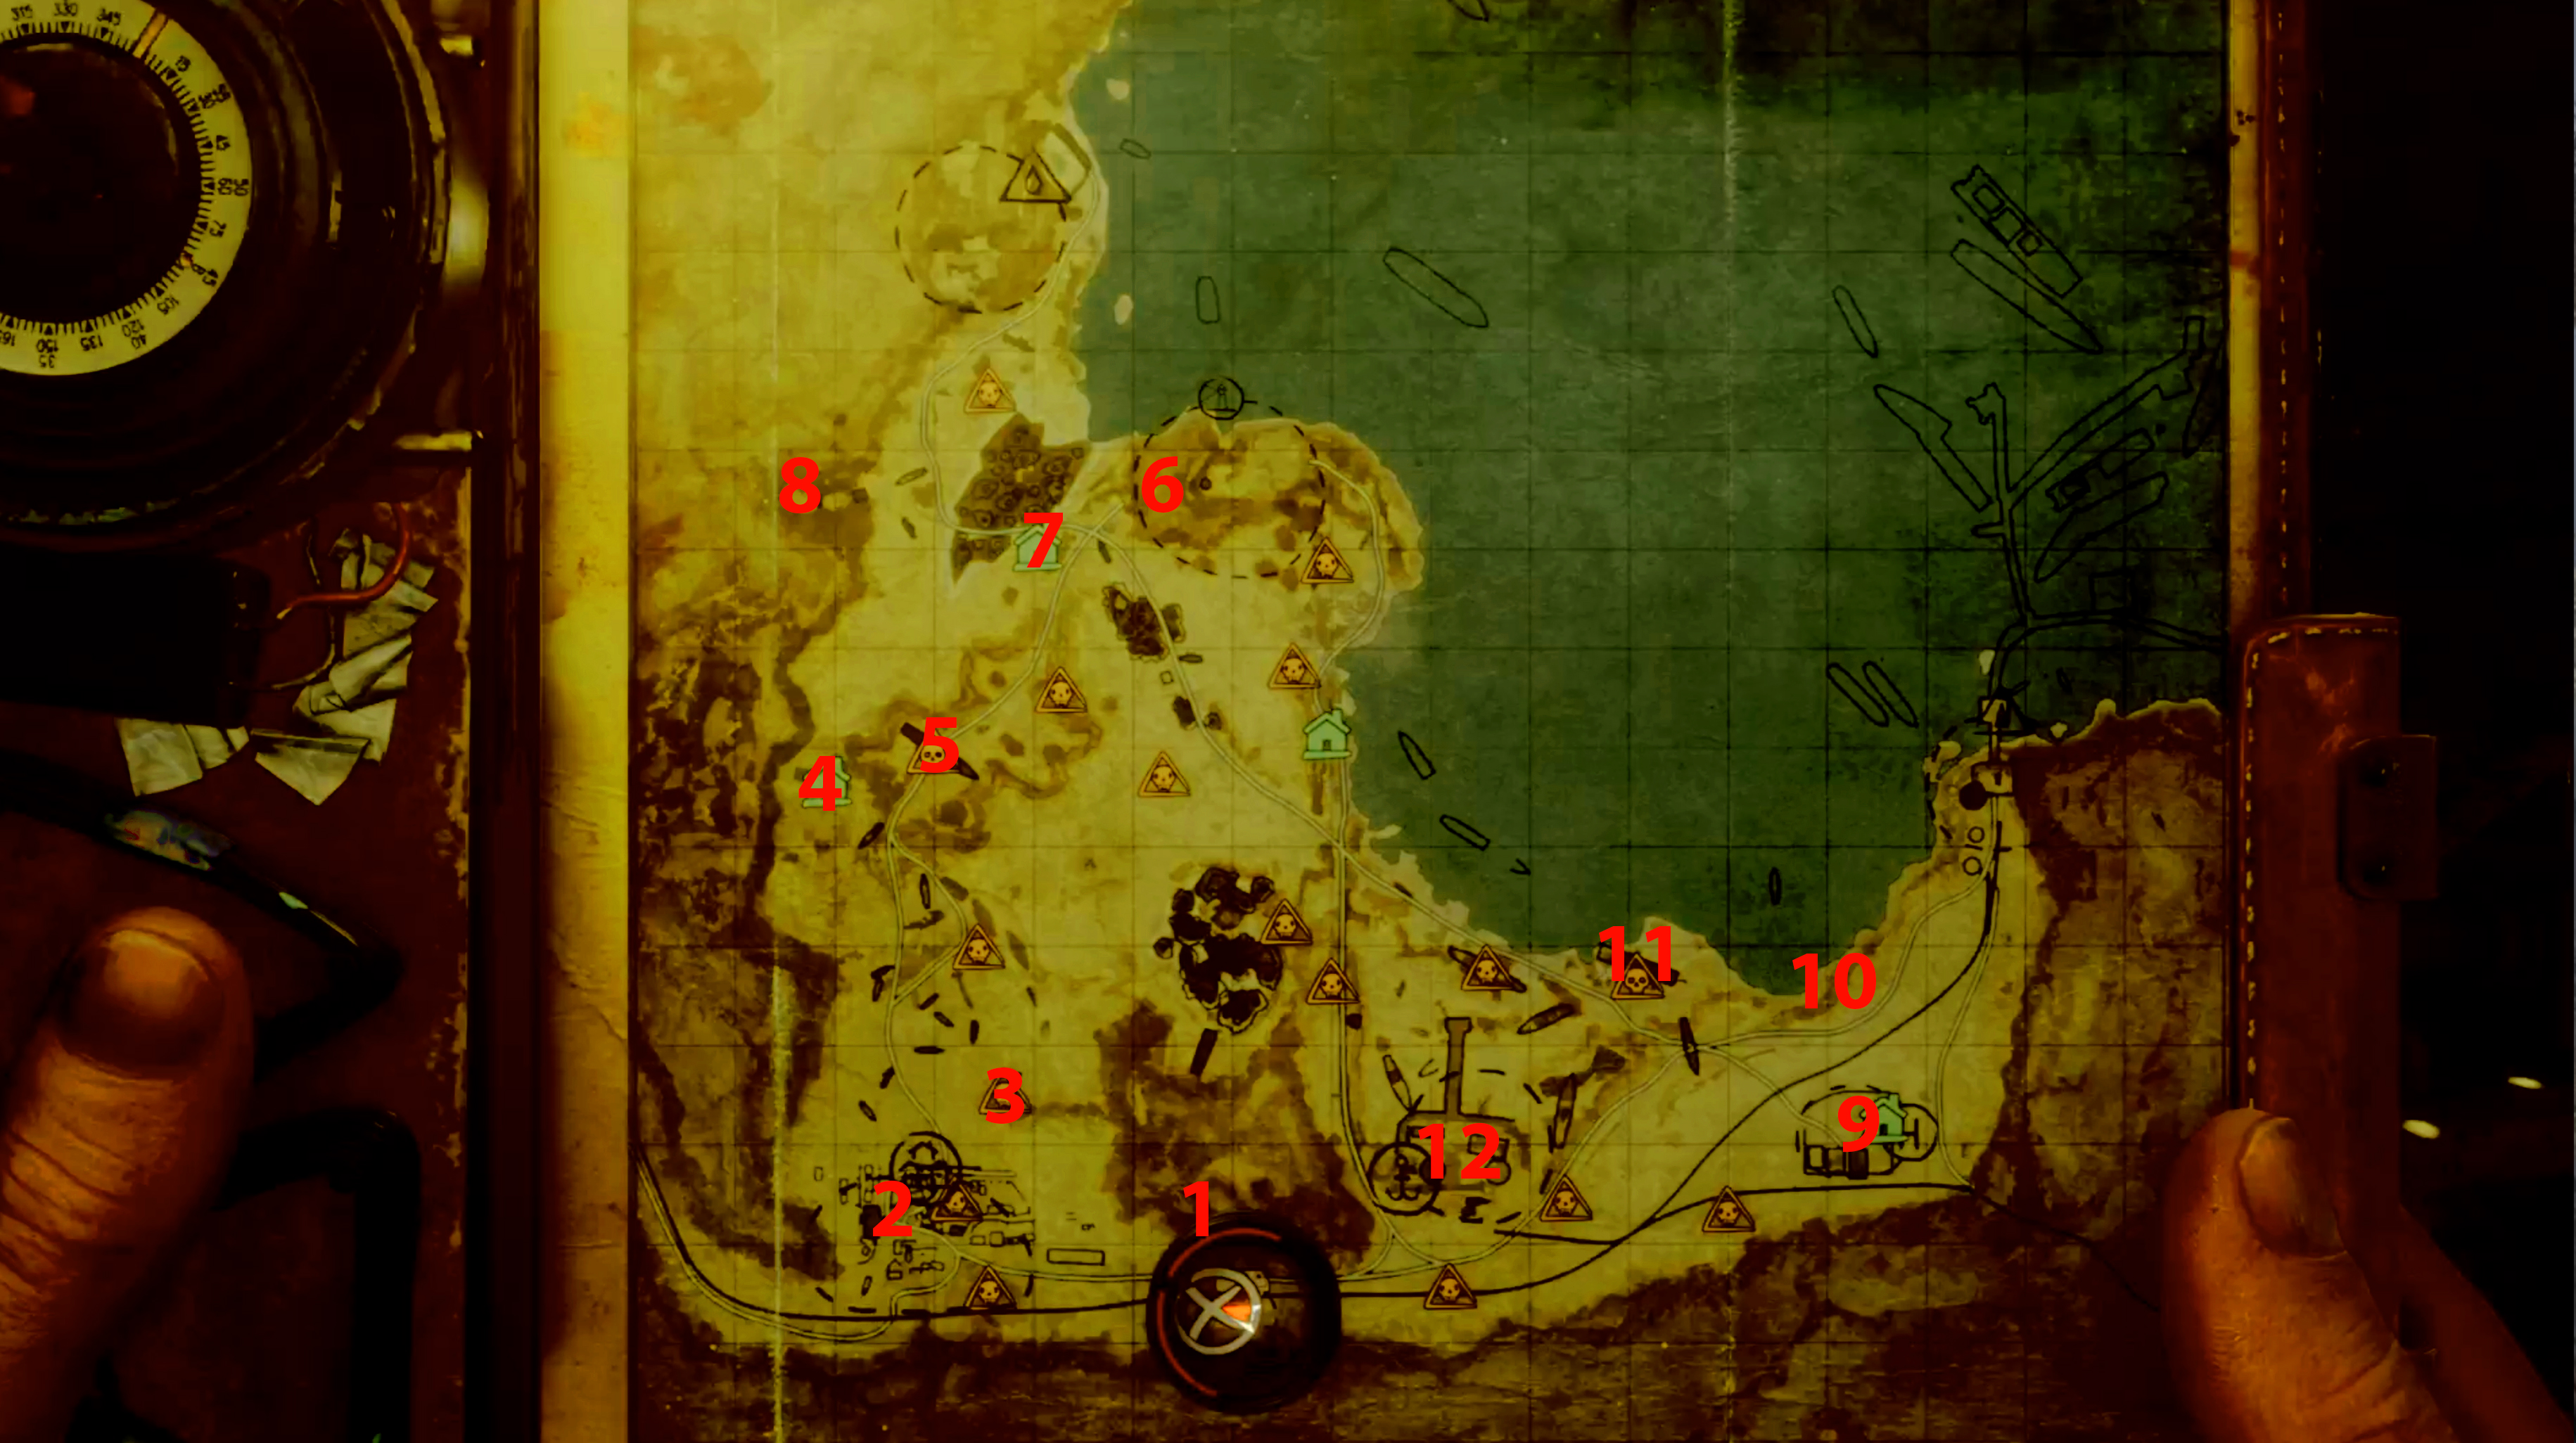
The Caspian expanse is a large open body of water bed turned desert. Y'all'll desire to visit Alyosha equally presently you get-go (the gun guy) to become the flame rounds for the Tikha, and so practise the first mission to access a automobile you tin can use to go around the residual of the map. There's a lot of side stuff here so use your binoculars regularly equally the apartment terrain means you have to scan from numerous vantage points to marking everything to your map.
- Ashot/shambler suppressor - On the fashion to your first mission you'll see a coulee here. At the end of it you lot'll discover an sometime army camp and an Ashot with a shotgun silencer that will fit the Ashot and Shambler.
- Shambler with minor cylinder - you'll have to visit this area every bit part of the start Yamantau mission. You'll be attacked on the roof and your attacker volition drib a Shambler shotgun with a 3 round cylinder. Pro-tip here: don't kill the guy that jumps you, he will come in useful later.
- Valve assault grip - If you haven't already found one you can grab an assail grip, stock and forend here on a Valve gun.
- Night vision scope - If you missed the Night Vision Scope in the Yamantau level there's another one in the safe house you'll detect here, along with a Heavy Stock and a Single Column Mag that agree five rounds for the Valve. Just watch out for the monsters and tripwire booby traps.
- Motion tracker, gatling gun and slave rescue - At that place'southward a shipwreck here with 3 reasons to visit. Firstly there'due south some other Gatling Gun on the mid level if you missed the one you can selection up in Yamantau. Secondly it's being used by slavers and if y'all kill them and free the slaves (without hurting them) it might just help you later on. But, almost chiefly, if y'all detect your way to the top there's a motion tracker yous can fit to your bracer.
- Bulldog machine gun - this isn't the merely place y'all can grab a Bulldog merely information technology'due south likely the offset if you're following the chief mission. It's basically a better Kalash and you can find it on the bodies of the enemies attacking the lighthouse.
- Actress bright calorie-free - In that location's a booby trapped condom house here so watch out for tripwire grenades. However if you can go in without blowing yourself upwards so in that location's an actress bright light that lets y'all encounter further and wider in the nighttime simply uses up your battery faster.
- Armoured gas mask - in that location'due south a subconscious canyon here where you'll accept to fight through some slavers to reach a cave at the stop (the ladder to accomplish information technology will only drib in one case everyone's dead). Within yous'll find a man who killed himself and an armoured glass upgrade for your gas mask, making it less likely to crack.
- Nighttime vision goggle upgrade - There's a military base here that doubles equally a rubber house. Yous'll accept to deal with security and fight mutants all the style to the top of the primary building merely when you lot do you'll unlock the NVD Amplifier which makes your night vision a lot clearer.
- Increased consumables carrying upgrade - head down here and y'all'll discover a tiny cave tucked abroad inside the cliff. In there you'll observe a Consumables Carrier which is an upgrade for your adapt that lets yous bear more air filters and med kits. Maybe also cheque out the guy you notice nearby. Y'all'll know why when yous go in that location.
- Armoured helmet, Ashot quad butt and slave rescue - There's some other shipwreck here full of slavers so but kill the bad guys, not the slaves. In the beginning main area y'all achieve you'll observe a Reinforced Helmet to absorb more headshot damage. You'll also discover two switches, one on the bottom level and 1 one the top level that will open the slave cages. And, finally, in the span right at the top/back, you'll find the Four Barrels attachment for the Ashot shotgun. That fires 2 barrels at a fourth dimension for loads of damage and recoil.
- 6x Sniper scope - If yous visit this crane you'll probably be bothered by the sniper style up on meridian of the thing. Brand sure y'all detect his gun when you lot kill him equally it'll take a 6 10 sniper scope for you to utilize.
Additional - Giul's photograph
After meeting Giul at the Caspian lighthouse as role of the main mission she'll let you into an clandestine bunker and ask if you lot can find her female parent'due south photo. This is basically a linear section simply go along an eye out for this door just after Damir says you have to utilise the air vents.
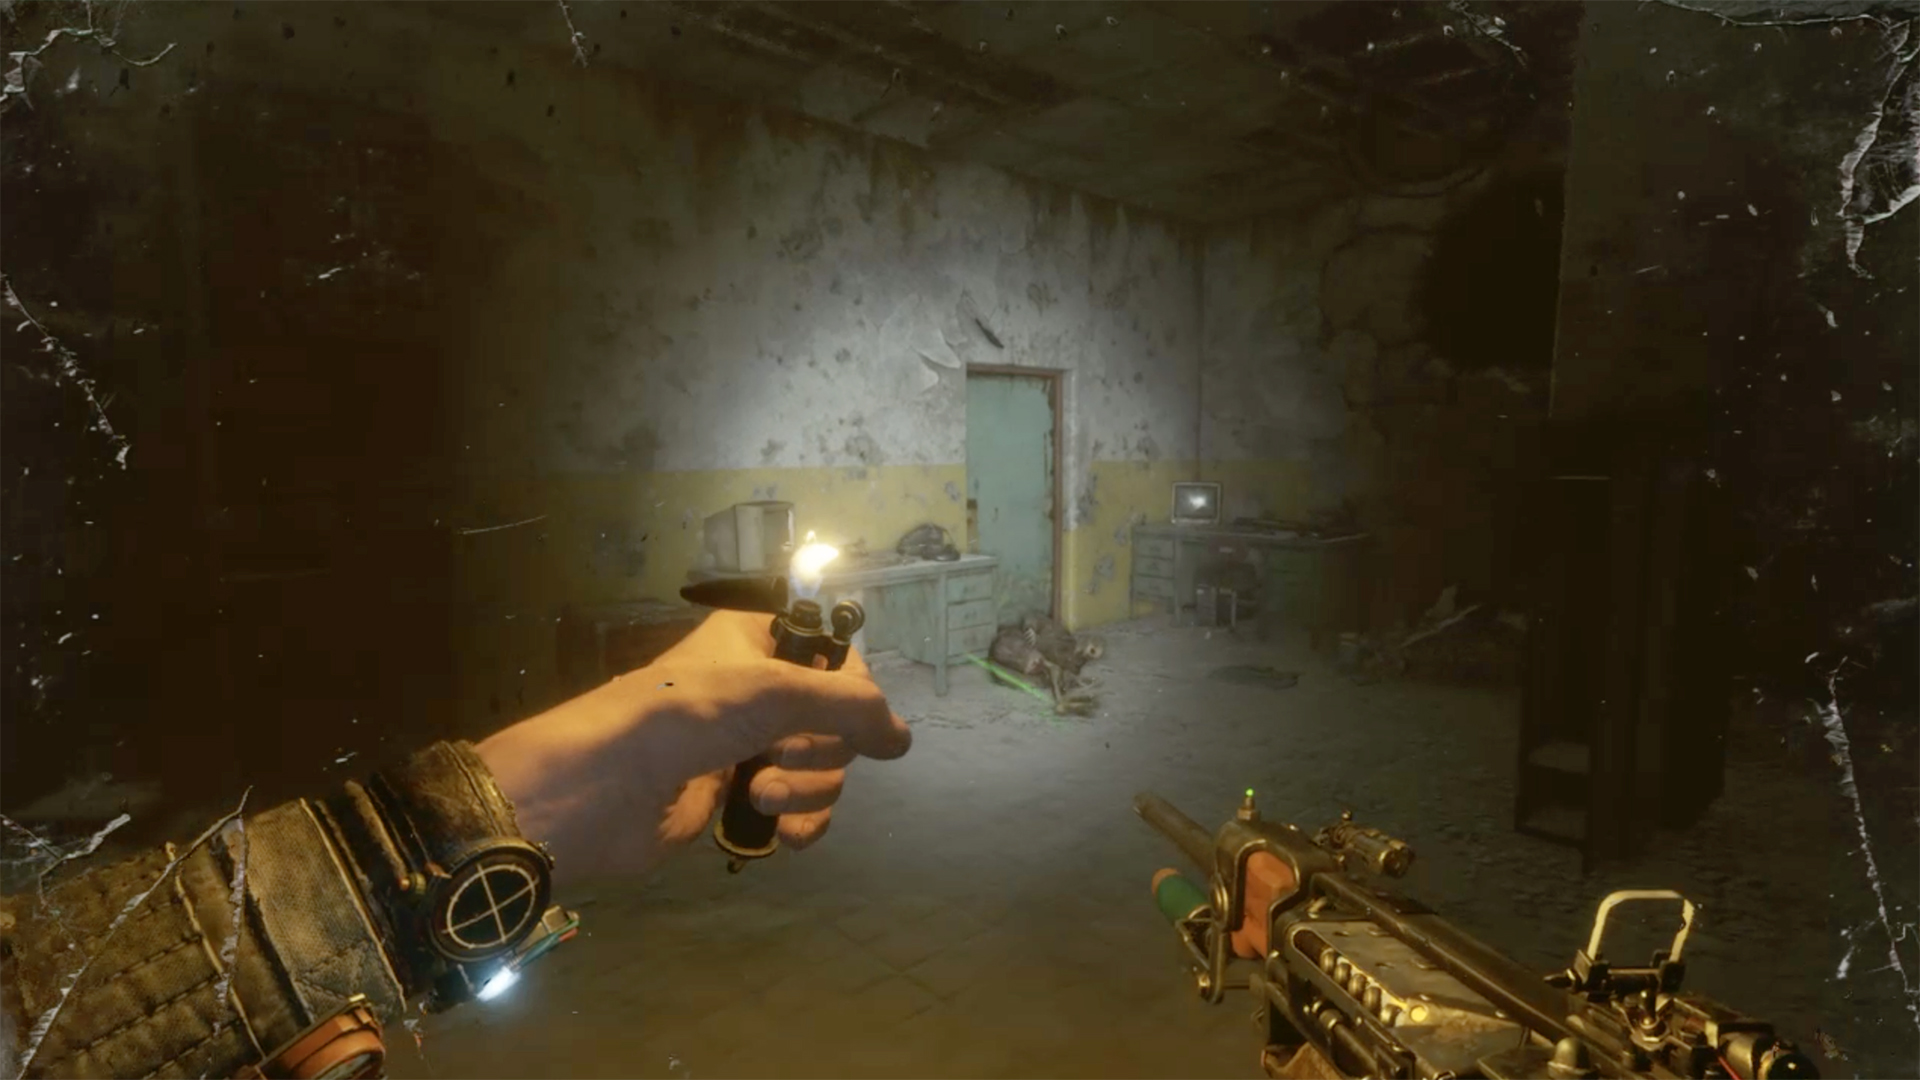
If y'all reach the dead officeholder by a collapsed air vent yous've got to far then backtrack a room or then and look for that one-half opened blue door past the desk and torso. Inside you lot'll find Giul'south mother'south trunk clutching a photo.
Taiga
The bulk of Metro Exodus' open world ambition happens in the Volga and Caspian, leaving Taiga equally more of a broad corridor than open plains to explore. In that location are also some spoilers so we're but going to show the map with come across/resources locations and safehouses. Every bit y'all can see it's a straightforward surface area and then there'southward not a lot of room to explore anyway - past the time you accomplish this point the game is dialling in the scale to build upward the momentum for its conclusion.
Metro Exodus tips (opens in new tab) | Best Metro Exodus Weapons (opens in new tab) | Best Metro Exodus upgrades and gear (opens in new tab)| Metro Exodus expert ending (opens in new tab)

Metro Exodus Shambler Magazine Location,
Source: https://www.gamesradar.com/metro-exodus-map-location-guide/
Posted by: smithdidellp1985.blogspot.com
0 Response to "Metro Exodus Shambler Magazine Location"
Post a Comment